home > content management systems (CMS) > smugmug
Add a Contact Form to SmugMug
SmugMug is useful piece of software for creating your own photo galleries. It is quite easy to add email forms SmugMug. The steps for doing this are outlined below.
A sample form on SmugMug can be seen here.
1. Generate the Form HTML Code
Before getting started, it is important to first create the form code used to display the actual form on your Smug Mug page. Please read the tutorial for generating your form HTML code.
2. Login to the SmugMug Administration Area
a. Go to SmugMug.com and login.

3. Add the Form HTML to Your SmugMug Layout
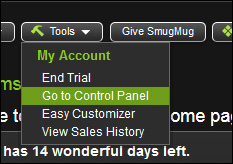
a. Click the Tools > Go to Control Panel
b. Click the Edit link next to Advanced Customizer
![]()
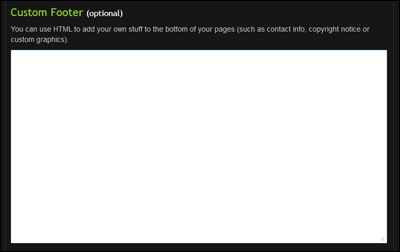
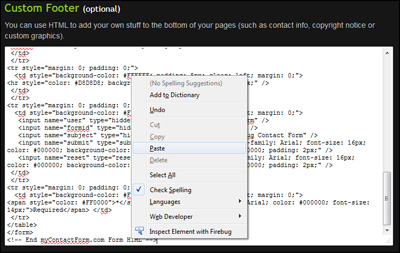
c. Scroll down to the Custom Footer input area
d. Paste the form HTML into the text area (CTRL+V or Right Click and Select Paste).
e. Click the Update button at the bottom of the page
![]()
4. Test the Live Form
Lastly, it is very important to test the live form. Open a web browser and navigate to the form. Fill out the form questions and press the submit button to send a test through. Verify that the information entered is correctly sent to your email address.
A sample form created using a SmugMug web site can be tested here.