home > content management systems (CMS) > wix
Use Wix to Add an Email Form to Your Website
The steps for adding email forms to a Wix web site are outlined within the tutorial below. A sample form created using a Wix web site can be seen here.
1. Build a Form and Export the HTML Code
The first thing you need is the HTML code that will be used for the form. Click here to read our full tutorial for generating the HTML code using myContactForm.com, a free email form service.
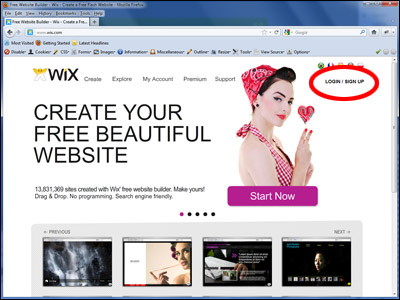
2. Go to Wix.com and Login to Your Account
a. Go to wix.com and click the Login link
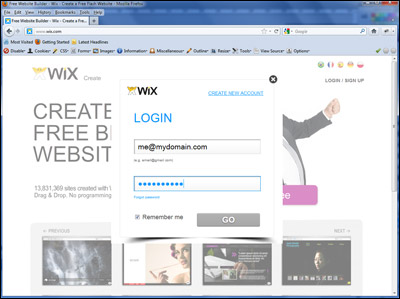
b. Enter you login details
3. Add the Form Code to Your Wix Site
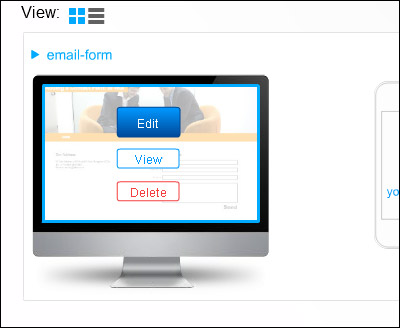
a. Hover over the screen shot of your site and click the Edit button
b. Under Manage Pages click the Page you would like to add an email form to.
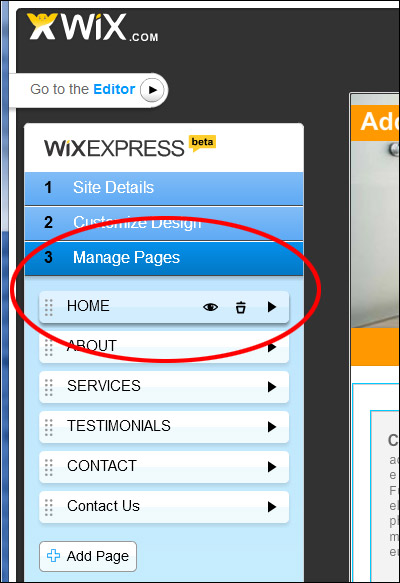
c. Click the Go to Editor button

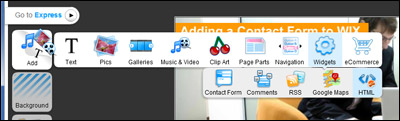
d. Add a new HTML Widget by hovering over Add then Widgets then HTML
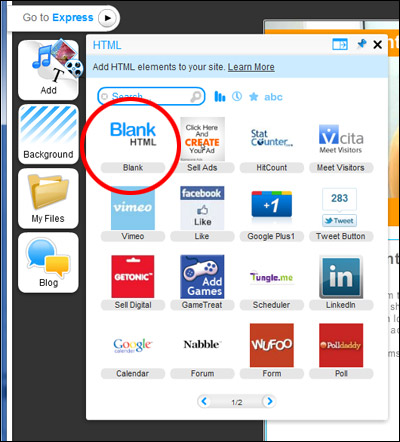
e. Select Blank HTML
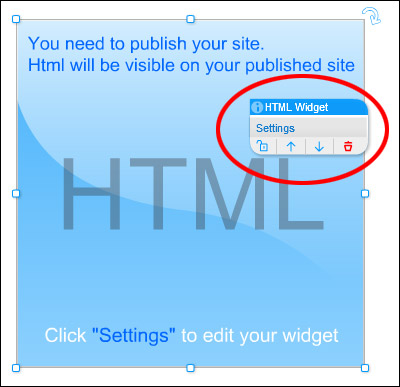
f. Maneuver the Blue HTML Widget Box so that it is located where you would like to to appear. Stretch it to the appropriate size.

g. Left Click the Blue HTML Widget Box and click Settings
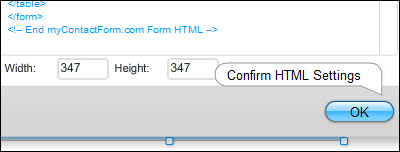
h. Paste the form HTML into the Insert HTML Code box (CTRL+V or Right Click and Select Paste).
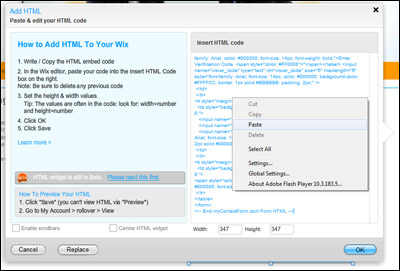
i. Note the Width of the HTML widget and click OK.
If you are having problems getting the form to fit within the allotted area, you can change the width of the form within the myContactForm.com Control Panel by:
1. Logging in to myContactForm.com
2. Clicking the Edit button
3. Clicking the Form Appearance button
4. Stepping through the steps until you see Form Width. Set the Form Width to a value slightly less than the width shown in Wix.
5. Click the Form Management button
6. Click Get HTML and copy the new HTML
7. Go back to WIX and update the HTML code for the widget
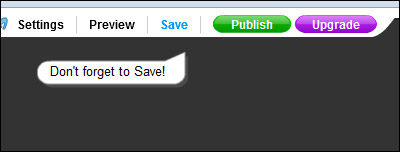
j. Click the Save button in Wix. This will publish the updated site.
5. Test the Newly Created Form
Navigate in your favorite web browser to the newly created form. Fill out the form questions and press submit. Check your email to make sure that the test form was successfully submitted.
A fully functional test form created on a Wix web site can be seen here.